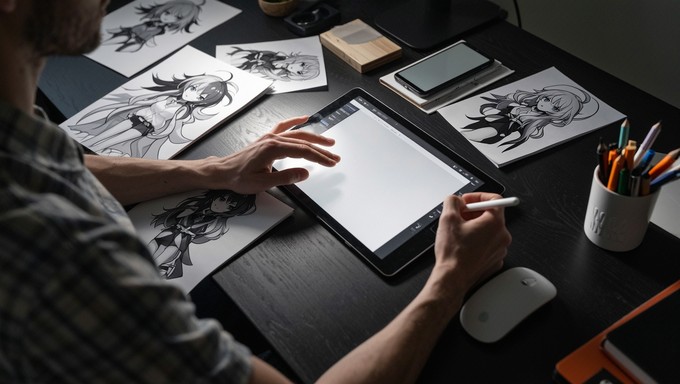

A customer sends a favorite photo and asks for an anime portrait as a birthday gift. Generating an illustration is only one part of the order. You also need to understand the requested style, preserve meaningful details, collect useful feedback, and prepare a file that fits the finished product. Photo-to-anime tools offer different ways to handle that first creative stage. These seven options suit different working preferences, from conversational direction to preset exploration and conversion inside a design workspace. The aim is to choose a workable production route, not assemble a subscription to every tool on the list.
Get a Clear Brief Before Choosing a Tool
Start with the delivery format: a digital portrait, greeting card, poster, or another agreed item. The destination determines the crop, available space, and production requirements. Ask whether the customer wants a close likeness or a more playful interpretation, and identify the features they care about most.
For a person, those might be glasses, hairstyle, expression, or a meaningful outfit. For a pet, markings and ear shape may matter more than the background. Request an unobstructed, well-lit reference and confirm that the customer can authorize its use.
Define the scope of revisions before starting. A request to correct glasses is different from replacing the pose and setting after the design has been approved. A short brief keeps those expectations visible and helps you select a photo-to-anime tool with an appropriate level of control.
7 Tools for Different Custom-Portrait Workflows
1. Flova: Turn the Customer’s Brief into Focused Revisions
Flova suits orders where a customer can describe the desired look but does not know technical art terminology. It accepts a source image and lets you direct the character, clothing, lighting, setting, palette, and mood through natural-language conversation.
Flova’s Image to Anime Converter can serve as the concept stage for that order. For example: “Create a warm, cel-shaded portrait for a birthday card. Keep the same curly hair, round glasses, and red sweater. Use a simple background with space above the head for a message.”
Review the first image against the brief before showing it to the customer. If the expression works but the sweater changes color, request that correction without redefining the whole scene. This gives the next preview a specific purpose instead of presenting a completely different interpretation.
The approved image can also become a reference for an animated project in Flova if the customer has requested a separate digital format. Do not bundle that extra work into an order without defining it.
Choose Flova when explaining and refining the art direction matters. Review recognizable features manually; instructions are not a guarantee of exact likeness.
2. insMind: Work with Pets and Meaningful Settings
Not every gift order starts with a headshot. A customer might want an illustrated pet portrait, a holiday scene, or a picture of a meaningful place. insMind’s photo-to-anime workflow explicitly supports pets, portraits, rooms, streets, objects, and landscapes.
For a pet order, ask the customer which markings or accessories must remain visible. For a travel photograph, identify the landmark or part of the setting that makes the memory personal. Otherwise, an attractive illustration may still miss the reason the customer chose that reference.
Upload a clear source, apply the Anime filter, and compare the preview with the photo. Examine small objects and background details as well as the main subject. If the pet occupies too little of the frame, a tighter crop may give the conversion a clearer starting point.
Consider ndinsMi when the order depends on more than facial features. Keep the subject and the meaningful setting easy to read in the proposed final crop.
3. Artguru: Add Specific Requirements to a Starting Style
For orders that need a more specific visual direction, a preset alone may not answer every part of the brief. Artguru’s photo-to-anime converter combines uploaded photos, style options, and written descriptions, giving you another way to express a customer’s preferences.
Select a suitable starting treatment and add a concise instruction about the details that need attention. For instance, request subdued colors, the same long hairstyle, and an uncluttered background for a portrait intended as a desk print. Avoid instructions that pull the image in several contradictory directions.
For each attempt, record the source and the direction used. That makes it easier to explain the change when the customer compares two previews. Use the description to clarify the requested treatment and identifying details, then approve the still artwork before developing any separately scoped deliverable around it.
Shortlist Artguru when you want style inspiration plus written customization. Check the available exports and current account conditions before committing to a delivery format.
4. AI Ease: Help Customers Choose a Visual Direction
Some customers cannot describe a style until they see alternatives. AI Ease’s AI filter workflow offers preset-led exploration, with anime among the available treatments. Upload a portrait or pet photo, select a filter, generate an image, and inspect the result.
For an order with an open-ended brief, prepare a small selection of clearly different directions rather than numerous nearly identical previews. Ask the customer to choose the treatment before making detailed layout changes. That separates style approval from production approval.
Before proposing a print or poster, inspect the actual exported file and check it against your production provider’s requirements. A preview that suits a small digital portrait may not suit the physical size the customer ordered. Check the current output terms separately from the creative approval.
Consider AI Ease when choosing a visual direction is the main obstacle. Once the customer selects a style, compare the expression and identifying details with the original before proceeding.
5. Media.io: Explore an Alternative Browser-Based Preview
If the first conversion route does not suit a particular reference, it can help to explore another documented workflow. Media.io offers browser-based photo-to-anime conversion with an upload, effect selection, preview, and download process.
Use it as an alternative creative option, not a promise that switching platforms will automatically fix every problem. Keep the source photo and customer brief unchanged so you can judge whether the new interpretation actually answers the order more closely.
The tool presents several anime and related illustration effects. Compare the treatment of faces, clothing, and the scene, then inspect the image at the intended display size. A more dramatic effect may be less suitable for a gift if it obscures the expression or a distinctive accessory.
Media.io is worth considering for browser-based exploration. Verify its current download conditions before sending a preview that you may not be able to deliver in the required format.
6. Photoleap: Finish the Portrait Without Hiding Its Problems
When the portrait works but needs further editing, Photoleap brings photo-to-anime filters and a wider editing environment into the same app. Its documented tools include image overlays, text, collage layouts, and cropping, supporting the transition from portrait to composed graphic.
Choose the photo-to-anime route for the illustration, then review the subject before arranging captions, overlays, or other decorative elements around it. The anime feature page specifies iOS availability, so confirm that the feature is available on the device you plan to use before adopting it for orders.
This is useful when a customer requests an illustrated digital card rather than only a standalone portrait. You can work on the composition and surrounding design while keeping the face visible. A border or sticker should support the artwork, not cover an unresolved hand, expression, or accessory.
Choose Photoleap when the order needs hands-on finishing. Keep the original reference and approved preview available, and check that subsequent edits do not accidentally change the crop the customer accepted.
7. Canva with Animeify: Build the Image into a Gift Layout
If the final product depends heavily on typography and layout, Canva offers a conversion route through the Animeify app. Its documented process is to open a design, find Animeify in Apps, upload a photo, and place the converted image in the project.
That makes it relevant to a greeting card or poster with a name, date, or message. Keep that text editable in the layout instead of relying on generated lettering inside the artwork. Review the spelling and position separately from the illustration.
Be clear about the distinction: Animeify provides conversion within Canva. Check its app conditions as well as Canva’s export options before choosing it for paid work.
Consider this route when the custom anime portrait must fit a larger composition. For a physical product, use the printer’s actual size, bleed, and file specifications rather than assuming a good-looking preview is production-ready.
Send a Preview That Produces Useful Feedback
Show the artwork in the agreed crop and label the version. Ask specific questions: Is the expression right? Are the important features present? Is the chosen background suitable? Explain which changes belong to the included revision scope.
Keep a record of approval before preparing the final file. If an order includes multiple formats, show how the crop changes between them. The customer should approve the actual composition, not a wide image that will later lose meaningful details.
Check the Delivery, Not Only the Illustration
Before handing over anime-style gift artwork, inspect the exported file, message spelling, edges, accessories, and final dimensions. For print, follow the production provider’s requirements and use a proof when needed. Check the tool’s current commercial-use conditions and the rights attached to source material; generating an image does not settle those questions automatically.
Choose the tool around the order’s main challenge: direction, style selection, scene detail, or finished layout. A clear brief, a controlled revision process, and an approved final composition matter more than offering customers every possible effect.

Raghav Sharma is a content writer and media researcher at Newsdata.io, specializing in news industry analysis, media literacy, and the evolving landscape of digital journalism. With a background in English Literature and Journalism, along with a focus on fact-based reporting standards, Raghav covers topics including news API technology, editorial bias evaluation, and responsible information consumption. Raghav’s work has covered media trends across categories, including healthcare news, international journalism, and API-driven publishing. You can connect with him on LinkedIn or explore more of his writing on the Newsdata.io blog.